We are offering computer classes for … Beyond the code 6th-12th grades. STEM classes focused on technology including digital forensics, cyber security, IoT, and Linux.
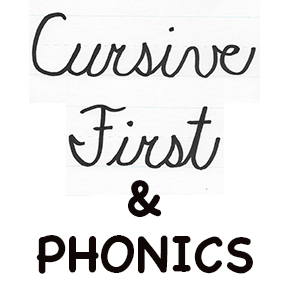
Cursive First Handwriting Samples
This is a follow up to our podcast episode on Cursive First. I am going to lay out, in a series of pictures, a rough outline of the process that I used to teach cursive writing and phonics to my five year old son. You will see writing samples for a one and a half year time frame.
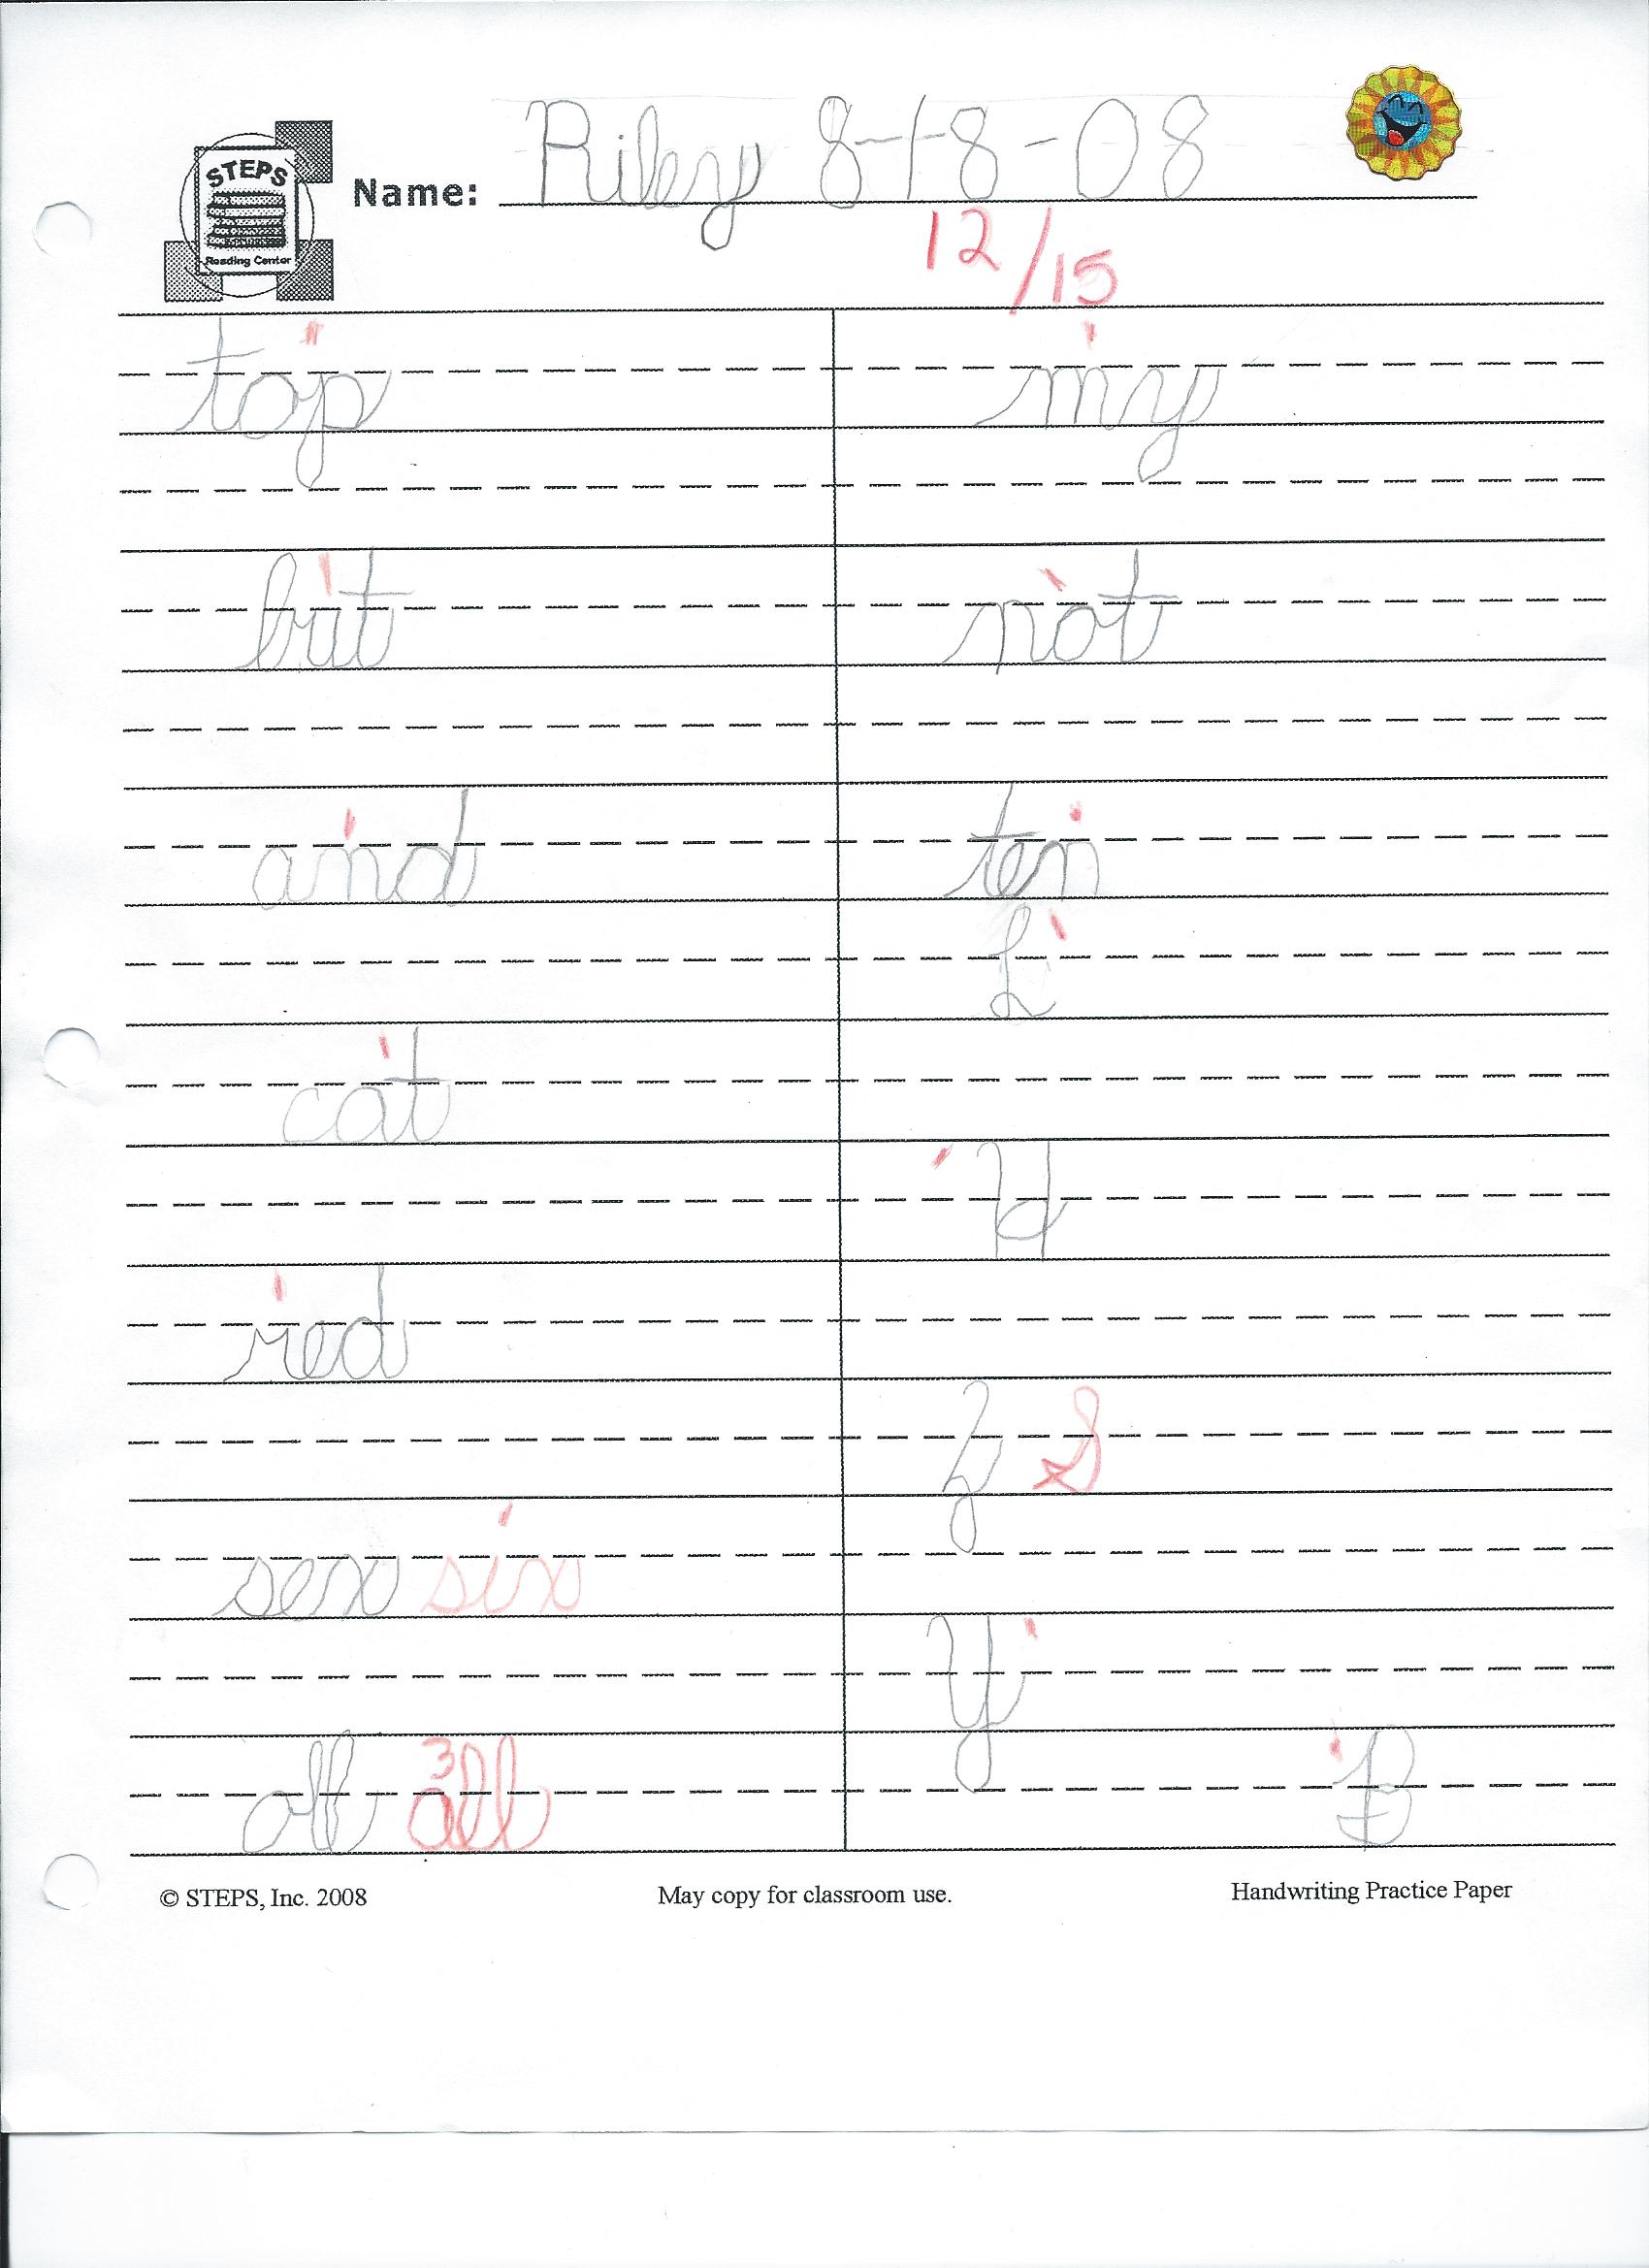
The reading program that I incorporated the Cursive First into is called STEPS (Sequential Teaching of Explicit Phonics and Spelling). Handwriting is included in STEPS but it was easy for me to take out that part of the program to use the Cursive First. I did switch to STEPS handwriting paper that does not have “skip lines” as soon as we were done with writing the numerals. Some children have a hard time transitioning to regular lined paper so I went ahead and taught that early on.
Cursive First fits more neatly with the SWR (Spell to Write and Read) curriculum. The author of Cursive First, Elizabeth FitzGerald, is a trainer for the SWR program. This program is easily obtainable, in fact I got my copy off Amazon. I do like that SWR has a Biblical base whereas STEPS was created for public school use. Perhaps I will do a more thorough curriculum review of both in the future….
I give you a brief description of these two reading methods to acknowledge that the writing samples of my son’s will look a little different than both these methods because I blended the two together. Beyond the writing, I find both the SWR & STEPS to be very similar in their method, phonograms, and spelling rules. STEPS just happened to be the curriculum I already had from my previous teaching days.
*Disclaimer: My son is not “gifted” in reading and writing. In fact, he really dislikes writing to this day & would much prefer to do math! He does love to read, and has consistently read above grade level, but I attribute that more to an effective reading method rather than “giftedness.”*
I started with teaching the appropriate “tripod” pencil grip, sitting posture, and writing position. I taught the clock face reference tool (or the handwriting circle reference tool used by STEPS). Then I used a variety of tactile and kinesthetic activities such using a salt box as shown below.


Teaching Reading and Writing with Cursive First
Podcast: Play in new window | Download
Subscribe: Apple Podcasts | RSS
In this podcast episode we interview Elizabeth (Liz) FitzGerald, M.S. the author of Cursive First. Liz lives in the San Francisco Bay Area with her wonderful husband David and three children. She is an Endorsed Spell to Write and Read (SWR) Seminar Trainer, a credentialed Special Day Class teacher, and she holds a Master’s Degree in Speech Pathology and Audiology. Before becoming a stay-at-home Mom, Liz had ten years of experience working in the public schools. She is currently homeschooling her own children as well as serving as an Educational Consultant to other educators.

Questions answered by Liz FitzGerald in this episode:
– Would you share some of the statistics on our nation’s literacy failures?
– Why is handwriting important?
– What is the history of handwriting in our country?
– How/why the shift in our educational system for reading and handwriting?
– What are the advantages of learning cursive first?
– Why cursive when we are a society filled print from computers and printing presses?
– Is it confusing to switch from print to cursive if you have already begun?
– Can this be used with special needs where they have weak or tired hands?
– Introduction for homeschool parents on how to begin cursive. (i.e., tactile practice of strokes using a salt box, sidewalk chalk, etc.)
You can order a copy of Cursive First at SWRTraining.com

Images used with permission from SWRTraining.com
![]()

Summer Structure
We talked about “Structure & Routine” in episode 5 from a schooling perspective… but what about the summer? Do we chuck the whole thing when school is out so to speak?
Confession time. I have had a really difficult time creating and sticking to a schedule since my precious forth child. I go back and forth. I found myself embarrassed upon confessing this to my mentor recently! You see I used to be such a “schedule queen.” I know, and have experienced firsthand, the benefits of a schedule so I have been DETERMINED to get over my hangup and create a schedule that works for us (that way I can just tweak it when school starts up again)!
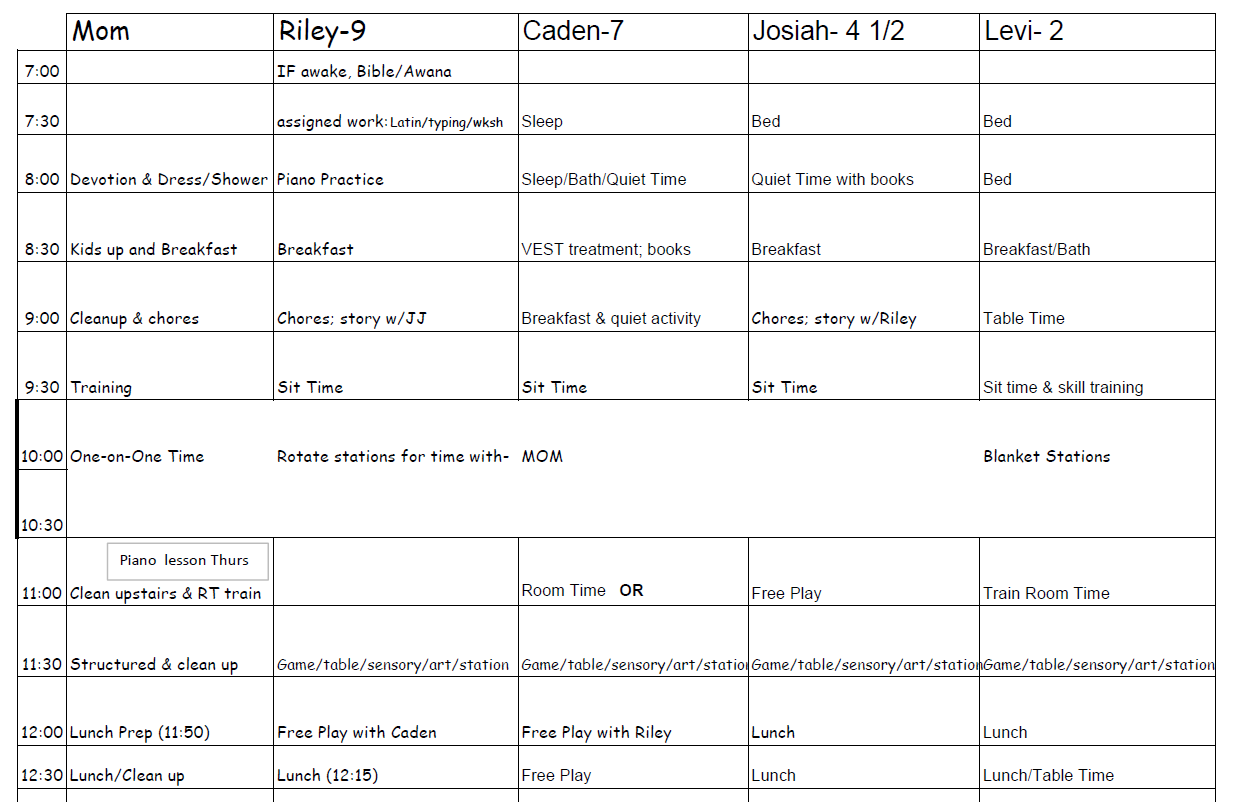
I am sharing the schedule that has been working for us for the past few weeks. I believe I have made my last tweaks for a while.
What I LIKE about our summer schedule:
- Filling the boys’ “love tank” with individual one-on-one time with EACH of my boys, EVERYDAY. It is only 15 minutes per child but I haven’t gotten as many “Will you play with me?” pleas. They are truly more content and happier and I feel better as a mother!
- More peace! They are playing MUCH better together with shorter spurts throughout their day rather than one long (usually unmonitored) period. Likewise, I am not frazzled at the end of my day and hubby has commented on the change in atmosphere when he walks in the door (which elicits a pleasant attitude from him and a more pleasant evening 🙂
- The children are doing more beneficial, learning types of activities. This requires my direction but the kids are engaged, exploring, & learning!
What does our schedule LOOK LIKE? Click the photo for a PDF version.

Keep in mind that the items in our schedule probably will not all be in your schedule! Use this list for ideas.
- Table Time: teaches the toddler how to be content once done eating by staying at the table with an activity. I’ve used magnets on a cookie sheet, puzzles, a book, Leap Frog fridge toys (with tape over the speaker because we are not deaf!), couple of cars, or any item with fewer parts than the stations in bullet #3.
- Sit Time: This is the vehicle I use to teach the boys what “self-control” looks like (of their bodies and mouth). Our boys all sit with us during church and we can’t expect from them in public what we have not trained at home. To train this, the boys sit in a kitchen chair and fold their hands and legs until the timer goes off. We started at 30 sec. when we first began our training with the boys as toddlers. We slowly increased the time as they were able to sit still and quiet (you may need to start your little one out on your lap). Remember this is not punishment, it’s training so be positive! A realistic goal when trained consistently is 15-20 minutes for a 4-5 year old. Think about how useful this could be at the bank, doctor office, or even completing a transaction…much better than fighting/pestering siblings when mom only needs a few minutes!
- One-on-one time: I use the same method of “learning stations” that I blogged about here. I put out a variety of toys, games, or even learning items- one on each blanket (I use the blanket only to serve as an obvious boundary as I am training a two year old 🙂 I have used the following as activities: Leap Pad, puzzles, books, busy bag items (pom poms are a favorite), Base Ten blocks, Rush Hour game, Tile Squares, Pattern Blocks, teddy bear counters (with cups & a spoon- the 2 year old’s favorite!), and many Learning Resources items. I set the timer for 15 minutes and spend that time with one of the kids. I like to do something educational but fun with them. The past couple of weeks, I’ve been using Discovery Toy’s Think It Through Tiles with the 7 & 4 year old, books with the 2 year old, & short games with my 9 year old like Scrabble Flash or Whiz Kid (though today we brushed up on his Latin work). It has been helpful for me to create a list of possible activities to pull from without causing me a whole lot of work or thought process.
- Room Time: is training the child to play in his room alone by staying in his room and playing (usually) with my choice of activity. This does not mean ram sacking the room & drawers!
- Structured Time at 11 &11:30: This is a flexible block for me. The activities could be: outside, game together, art supplies, a cool activity at the table, or sensory play. I have done play-dough, water bucket, rice bucket, bean bucket (the buckets provide texture experiences as well as scooping & pouring with play kitchen toys- but do spread out a sheet/blanket to catch any spills!) I have found Pintrest to be an amazing wealth of ideas to do in this area!!
- Free Play: for our family, it is in our play room downstairs that is full of toys and the child chooses what to play with. This is almost always with one or more sibling.
- Bilibo
at 1:00 is a turtle looking shell that a child spins in
- Play Yard: is a hexagon linked gate
. I use it during those fussier times (aka when playing with his brothers just elicits temper/crying) or when he won’t stay within the physical boundaries he is given like the playroom (the last thing I need is to find him “playing” in the bathroom!) Carpet: is the family room located on the other side of the kitchen and there is a small toy basket there.
- Read Aloud Time: I use the 2-3:00 time slot for reading aloud a chapter book or working on any project/school lesson that needs my attention.
- CT is for Couch Time where my husband and I spend 10 minutes talking while the children read books in the same room. This prioritizes the husband/wife relationship and also teaches courtesy & self control with regards to not interrupting- see On Becoming Baby Wise, P. 30

Remember not to be a slave to your schedule! It’s purpose is to serve you. If you find that you are always “behind” trying to catch up, then give yourself more time for the activities perhaps working in bigger time blocks. I hope these ideas will help you create a schedule that fits YOUR family so you can get the most out of your summer!
- « Previous Page
- 1
- 2
- 3
- 4
- 5
- 6
- …
- 13
- Next Page »