We are offering computer classes for … Beyond the code 6th-12th grades. STEM classes focused on technology including digital forensics, cyber security, IoT, and Linux.
Cyber Defense Competitions for Home Schoolers
The Home School Support Network (HSSN) Online Academy has been educating and equipping students to participate in cyber defense competitions since 2014. Two of the most prestigious competitions that our students have participated in are: US CyberPatriot the National Youth Cyber Education Program and the Palmetto Cyber Defense Competition (PCDC).
The US CyberPatriot program runs online competition events for middle school and high school students that focus on operating and defending individual computer operating systems like Microsoft Windows, Ubuntu Linux, as well as Cisco network appliances. Cyber security is a strong focus area. HSSN has fielded multiple teams per year since 2014 in the US Cyber Patriot program with students from around the lowcountry of South Carolina ranging in age from those in 6th through 12th grade.
The Palmetto Cyber Defense Competition is a three day event hosted by Space and Naval Warfare Systems Center (SPAWAR) Atlantic in collaboration with the South Carolina Lowcountry Chapter of the Armed Forces Communications and Electronics Association (AFCEA). The first day of PCDC is when High school teams are invited to compete based on their performance in the US Cyber Patriot Program’s state round. These PCDC events are very competitive and result in head-to-head between some of the best trained high school teams from around the state of SC. The format of these events are red-on-blue live competition and require teams to operate and defend a complex set of networked computers while defending against live attackers. The event attackers are professionally trained penetration testers and red team members primarily from within the Department of Defense (DoD).
The Home School Support Network Online Academy provides students with basic system administration knowledge and skills training at HomeSchoolSTEM.com. Local Charleston area students have an opportunity to join a HSSN Cyber Team that meets regularly to receive more advanced training and preparation for events like those hosted by US CyberPatriot and PCDC. Our HSSN Cyber Teams regularly finish in the top five teams in SC in the US Cyber patriot events.
Leave a comment below or join or Cyber Team Info Mailing Lists to learn more about how to get home school students in these competitions.
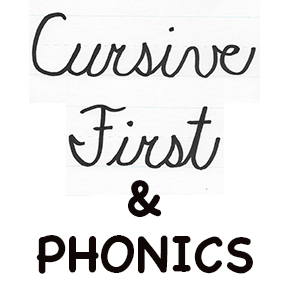
Teaching Letter Sounds Through Writing
The following video is an explanation on how to teach phonograms (“phono” means “sound” and “gramma” means “written symbol”) to any age child. I am teaching my son, Levi, who is 5 years and 4 months old in the video. The method I am using is called STEPS (Sequential Teaching of Explicit Phonics and Spelling) and is a curriculum you can purchase designed for teaching all ages to read and write (even English as a second language for adults). Another curriculum that has the same principles is SWR (Spell to Write and Read). The main difference, in my opinion, is the delivery method. STEPS is written for public school teachers to be able to use without training and is easier to implement with the lessons & answers being scripted out. SWR is not scripted out but I have found the additional information on the origins of words to be invaluable!
Affiliate links for resources used in the video:
Stetro Pencil Grips – Assorted Colors
* The lines were drawing on our Doodle toy by the parent using a permanent marker and ruler.
If you are a first time user of either program, you will notice the markedly different approach of teaching the sounds through the use of writing. Saying the phonogram sounds while writing is a major tool for memory! They need to SEE it, HEAR it, SAY it, and WRITE it! Sanseri states in Spell to Write and Read that, “Saying and writing the phonograms help build neuro-connectors that tie together four distinctly different areas of the brain and more strongly imprint the sound-symbol link for later recall. Such multi sensory instruction teaches to every child’s strength and remediates every child’s weaknesses.” (SWR p33)
One reason I made this video is to better clarify how to introduce new phonograms, especially the verbalizing part. You will notice as I go along that some of the dictation (verbalizing) words are dropped. This is because I want to get my child away from saying the strokes to saying only the phonogram sounds as soon as possible! The foundational groundwork that has already been laid, is the spatial awareness of the paper lines (top line, mid line and baseline), the terms right and left, teaching of the handwriting Circle Slide visual from STEPS (SWR uses a clock face visual), and the names of the cursive strokes (SWR uses different titles for the strokes than you will hear).
Please keep in mind that the process you will see in the video is repeated for EACH NEW PHONOGRAM–DAILY! After 2-3 days of this process, I am able to drop the dictation (verbalizing) words altogether from the daily practice. Those dictation words then become used only when my child is stuck and “can’t remember” how to form a phonogram.
One caution- while many children resist pencil and paper writing in favor of the more fun tactile experience, the latter cannot be abandoned! Please don’t buy into the lie that all learning has to be fun! It simply won’t be…and the same is true for real life responsibilities! The tactile is helpful because we retain information better when we use more methods of input. This is one reason we write our phonograms while they say the sounds the phonogram makes. Likewise, using a salt box, sidewalk chalk, or shaving cream on a table to ‘write’ the phonograms while saying the sounds makes the learning pathway stronger. However, only practicing with the fun tactile methods will not be sufficient practice! As the week progresses, if your child is struggling with any phonograms you should increase the number of times your child is writing them on paper. The video example shows writing the phonogram F six times before moving onto the next phonogram. After a couple of days, I will increase this practice to 10-15 times each for the ones my son still struggles with. This is why I assign a weekly “home quiz” with any missed ones to be written EXTRA on the back of the quiz paper. I begin the process that the video shows on Thursday and continue with more of the same on Friday and Monday. Tuesday morning I give a quiz (without any warm up practice) to see the phonograms he struggles with most and THAT is where I focus (and increase) the practice, only reviewing the others to keep them fresh! The Magna Doodle is an excellent tool to keep things fresh and to take advantage of those unused moments in the car!
Related:
Registration is Open
We have opened up registration for the new Introduction to Computers and Security on demand class. 
This class is intended for middle and high school students interested in enhancing their knowledge, skills, and abilities in Information Technology or Cyber Security. All students can benefit from this course regardless of their future education or career plans. Students will learn how computer systems work. They will learn how to troubleshoot computer systems using system administration skills on Microsoft, Apple, and Linux operating systems. The class will be delivered via recorded instructional videos with additional assignments and quizzes. Students and parents will have access to grades using the Home School Support Network (HSSN) Online Academy Learning Management Software (LMS).
What are parents of previous students saying about this course?
“My son has been involved in this since last summer and has learned so much and has built friendships along the way. Hank Osborne is a godly man who has been a wonderful encouragement to my son and he has inspired to him learn more.” Laura F. (Charleston, SC)
UPDATE: The class has been published as of June 30, 2015. Visit the Online Academy page for more information about this course.
- 1
- 2
- 3
- …
- 13
- Next Page »